Homemade Electrolyte Drinks for Hydration and Energy
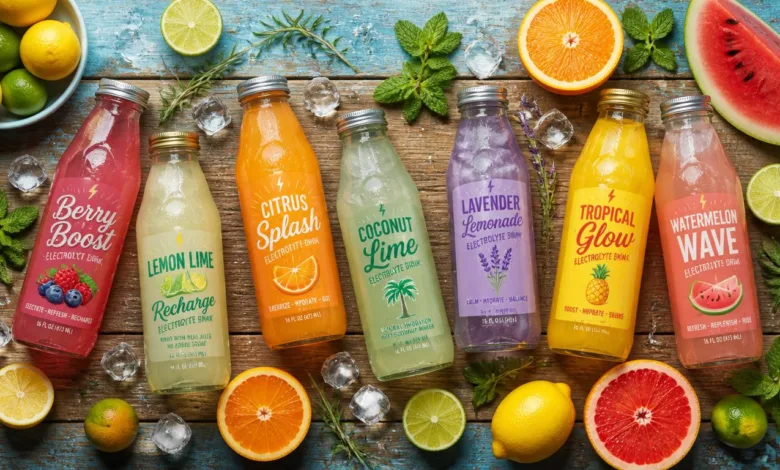
When you’ve pushed yourself through an intense workout, a long hike, or simply faced a sweltering day, reaching for water might not always be enough to replenish your body. That’s where homemade electrolyte drinks come in. These refreshing beverages provide a straightforward and wholesome approach to restoring fluids and essential minerals using familiar ingredients. You have the freedom to customize flavors according to your palate, and the best part is that preparing a pitcher takes only minutes. Keep it chilled in the fridge and pour yourself a glass whenever you need a revitalizing boost.
It’s important to note that this article is for educational purposes and should not be taken as medical advice. Always consult with a healthcare professional before making significant dietary changes, especially if you have any underlying health conditions.
The Benefits of Homemade Electrolyte Drinks
Creating your own electrolyte drinks at home is both practical and advantageous. You control every aspect of the drink, from sweetness to sodium to levels of citrus. This is particularly helpful when you’re aiming to reduce your consumption of overly sweet commercial sports drinks and still crave that refreshing, hydrating experience.
So why should you incorporate these homemade drinks into your routine? Here are several reasons that might encourage you to whip up your own batch:
-
Rehydration: Homemade electrolyte drinks are designed to hydrate your body effectively by combining liquid with essential electrolytes like sodium and potassium. In this recipe, coconut water serves as a source of potassium, while Himalayan pink salt adds sodium and trace minerals. Fresh citrus enhances flavor and introduces a bit of natural carbohydrates.
-
Customized Nutrition: This drink is not a medical formula but rather a practical, kitchen-friendly alternative to packaged beverages. You will be mixing coconut water, fresh juice, and salt in a pitcher, diluting with water to achieve a flavor that is satisfying for you.
-
Adjustable Ingredients: The process involves tasting as you go, allowing you to modify the sweetness, sourness, and saltiness to suit your preferences. As different brands of coconut water vary in sweetness, this flexibility ensures you create a drink you truly enjoy.
-
Convenient Storage: Once prepared, you can keep your electrolyte drink in the fridge for quick and easy access. This makes it ideal for those busy days when hydration is crucial but time is limited.
How to Make Homemade Electrolyte Drinks
Creating your own electrolyte drinks is straightforward. You just need a few simple ingredients and a little bit of time. Follow these instructions for a delicious drink that is both refreshing and hydrating.
Ingredients You Will Need
- Coconut water (4 cups): This will form the base of your drink, adding natural potassium and a slight sweetness. If you prefer, select unsweetened coconut water to keep sugar content in check.
- Citrus juice (juice of 2 limes): This not only enhances the flavor but also provides vitamin C.
- Himalayan pink salt (1/4 teaspoon): This key electrolyte brings sodium to your drink.
- Honey or agave syrup (optional): Use this to add a touch of sweetness, particularly useful if you find the drink too tart.
- Water: For dilution, add to your preferred taste.
- Fresh herbs (optional): Adding mint or basil gives the drink a refreshing twist.
Step-by-Step Instructions
-
Combine Coconut Water and Citrus: Begin by pouring 4 cups of coconut water into a large pitcher. Squeeze the juice of 2 limes directly into the pitcher. The resulting mixture will have a slightly cloudy appearance and a bright, fresh aroma.
-
Add and Dissolve Salt: Introduce 1/4 teaspoon of Himalayan pink salt into the mixture. Stir vigorously for 20 to 30 seconds until the salt is fully dissolved. Check the bottom of the pitcher to ensure there are no grains settling. If you notice any, continue stirring until uniform.
-
Sweeten to Taste: Give the mixture a taste test. If it feels overly tart, especially for prolonged activities, consider adding honey or agave syrup one teaspoon at a time until you reach your desired sweetness.
-
Dilute with Water: Gradually add cold water, stirring and tasting after each addition. You want to find a flavor balance where you note a hint of saltiness, but the drink does not taste overly briny or strong.
-
Add Fresh Herbs: If desired, gently clap fresh mint or basil leaves between your hands to release their aroma, then add them to the pitcher. This step elevates the drink’s refreshing quality.
-
Chill and Serve: Let the drink chill in the refrigerator for at least 30 minutes, which allows flavors to meld beautifully. Serve it over ice for a crisp, refreshing experience.
Nutritional Insights
The nutritional content of your homemade electrolyte drink will vary based on your specific ingredients, dilution levels, and sweeteners used. However, as a general guideline:
- Calories: Usually low to moderate, contingent upon the sweetness level you choose.
- Carbohydrates: Primarily from coconut water and citrus, with an increase when sweeteners are added.
- Protein and fat: Minimal amounts.
If you’re following a keto or very low-carb lifestyle, this recipe can still work for you by opting for unsweetened coconut water, omitting added sweeteners, and increasing dilution with water. Some strict keto enthusiasts prefer drinks made solely with water and an electrolyte salt blend, but this recipe offers a more natural and food-based approach that incorporates light sweetness.
Customization Options

You can tailor your homemade electrolyte drinks to fit your own dietary goals and preferences. Here are some suggestions for customization:
- Skip Sweeteners: If you’re aiming for a low-sugar option, feel free to skip the honey or agave syrup altogether.
- Adjust Citrus: Experiment with different citrus choices like lemon or orange for unique flavor profiles.
- Infuse with Herbs: Try adding cucumber slices or other fresh herbs to further personalize your drink’s taste.
- Higher Protein Addition: Mix in unflavored collagen peptides for an added protein boost.
Tips for Best Results
To ensure that your homemade electrolyte drinks taste great every time, consider these tips:
- Fresh Ingredients: Use fresh coconut water and citrus for the best flavors. Bottled juices may work in a pinch but lack the vibrant taste of freshly squeezed juice.
- Stir Well: Ensure that the salt dissolves completely. Undissolved salt can leave you with inconsistent flavors in each glass.
- Taste as You Go: Always taste your drink after diluting with water. Coconut water brands can vary significantly in sweetness, so your adjustments might differ each time.
- Make Ahead: Preparing larger batches can encourage regular hydration, especially if you have a pitcher ready to go in the fridge.
Enjoying Your Electrolyte Drink
Once your homemade electrolyte drink is ready, there are several enjoyable ways to serve it to yourself or guests:
- Ideal Post-Workout: A glass of electrolyte drink is perfect to sip on 30 to 60 minutes after intense workouts, particularly in hot weather.
- Sparkling Version: For a fizzy treat, replace part of the water with chilled sparkling water just before serving.
- Mocktail Option: Serve in attractive glasses over ice with garnishes like mint sprigs and lime slices for a delightful mocktail experience.
Storing Your Drinks
When it comes to storing your homemade electrolyte drinks, simplicity is key. Here are some storage suggestions:
- Refrigerate: Store your drink in a covered pitcher or a sealed bottle for up to three to four days. Keep in mind that citrus flavors tend to fade after 48 hours.
- Herb Note: If you opt to include fresh herbs, strain them out after four to eight hours to prevent any bitterness or discoloration.
- Freeze Leftovers: If you have excess drinks, consider freezing them into ice cube trays. These reusable cubes can be added to water or fresh batches to keep your drink cold without diluting it too quickly.
Final Thoughts
Making your own homemade electrolyte drinks can be a great addition to your hydration strategy. With everyday ingredients readily available, you can create a drink that is not only delicious but also supportive of your wellness goals. Whether you’re adjusting flavors for a personal touch or keeping it simple, these drinks provide a refreshing alternative to conventional sport beverages.
When plain water doesn’t quite hit the spot, this beverage offers a straightforward and effective solution to staying hydrated. Tweak your recipe until it becomes your go-to refreshment, and keep a pitcher handy for those hot days or after vigorous activities. Soon enough, you’ll find yourself reaching for your homemade electrolyte drink as a staple in your daily hydration routine.
Share this recipe with friends and family who are training, traveling, or simply seeking to increase their fluid intake. Enjoy the refreshing taste and the well-deserved benefits of keeping your body properly hydrated.