How to Do Makeup for Beginners: Your Go-To Guide for Natural Makeup for Black Women
Ready to figure out how to do makeup for beginners without the overwhelm? This guide walks you through natural makeup for Black women step-by-step — from finding your undertone to nailing that “your skin but better” glow — no guesswork, no gatekeeping, just real talk and practical tips.
So, you’ve decided to finally dive into the world of makeup, huh? Good for you! Whether you’re doing this for a fresh start, a confidence boost, or just because TikTok made it look fun, learning how to do makeup for beginners doesn’t have to feel like rocket science. And if you’re specifically searching for natural makeup for Black women, you’re in exactly the right place, because honestly, a lot of generic beauty advice just doesn’t cut it when it comes to melanin-rich skin.
Here’s the thing: natural makeup for Black women isn’t about piling on product until you look like a different person. It’s about enhancing what you’ve already got — glowing skin, gorgeous depth of color, and features that deserve to be highlighted, not hidden. In this guide, we’ll walk through everything from prepping your skin to picking the right shades, and by the end, you’ll feel way more confident picking up that brush. Let’s get into it!
Why Natural Makeup for Black Women Deserves Its Own Conversation
Let’s be real for a second: the beauty industry has historically dropped the ball when it comes to shade ranges and formulas that actually work for deeper skin tones. Ashy foundations, chalky sunscreens, blush that reads as “muddy” instead of flushed — sound familiar? A guide from Lipstick Queen points out that Black consumers report significantly higher dissatisfaction with makeup offerings than non-Black consumers, and a big chunk of that comes down to complexion products that historically skewed toward lighter skin tones. That’s frustrating, but the good news? Brands have gotten a lot better, and once you know what to look for, natural makeup for Black women becomes way easier to nail.
On top of that, deep skin tones have their own unique needs. Undertones matter enormously, oxidation (when foundation darkens after it’s applied) is a real thing you need to plan for, and certain formulas are simply more prone to looking ashy than others. None of this is meant to scare you off — quite the opposite. Once you understand these little quirks, you’ll skip years of trial-and-error that a lot of us went through. Consider this your shortcut!
Step One: Prep Your Skin Like You Mean It
Before any makeup touches your face, skin prep is non-negotiable. Think of your face as a canvas — you wouldn’t paint on a dusty, dry canvas and expect a masterpiece, right?
Here’s a simple prep routine that works for basically everyone:
- Cleanse with a gentle, sulfate-free face wash to remove dirt and oil.
- Moisturize generously — dry patches are the number one enemy of a smooth makeup finish.
- Apply sunscreen, even indoors, even on cloudy days. This one’s huge and often skipped by folks with deeper skin tones because of the myth that melanin alone is “enough” protection. According to dermatologist Dr. Michelle Henry, natural melanin only offers the rough equivalent of SPF 4 to 13, which is nowhere close to the SPF 30 minimum dermatologists recommend for daily use. Skipping SPF can leave you dealing with hyperpigmentation and uneven tone down the road, and honestly, who has time for that?
- Prime your face with a lightweight, hydrating primer to help everything blend and stay put.
Don’t rush this part! A rushed prep routine is a dangling thread that unravels your whole look later in the day — patchiness, oxidation, and cakey-ness will creep in if you skip steps here.
Step Two: Nail Your Undertone Before You Buy Anything
Okay, real talk: this is the step that trips up most beginners, and it’s arguably the most important one in the entire process of learning how to do makeup for beginners. Your undertone (the subtle color underneath your skin’s surface) is different from your overall skin tone, and getting it wrong is the fastest route to that dreaded “foundation line” down your neck.
There are three general undertone categories, and here’s a quick breakdown:
- Cool undertones – hints of pink, red, or blue beneath the skin.
- Warm undertones – hints of yellow, gold, or peach.
- Neutral undertones – a healthy mix of both.
A quick way to check? Look at the veins on the inside of your wrist. Bluish veins usually signal cool undertones, while greenish veins point to warm undertones — though this method can be trickier if you land somewhere in the neutral zone. For deeper skin tones specifically, experts note that rich shades with red, blue, or golden undertones tend to work best, and it’s smart to steer clear of formulas that look ashy or grayish once applied.
And here’s a pro tip that’ll save you money and frustration: always test foundation on your jawline, not your wrist. Your wrist skin is a completely different tone from your face, so swatching there is basically useless — a classic beginner mistake, and honestly a super easy one to avoid once you know better.
Step Three: Building Your Everyday Natural Makeup for Black Women Look
Alright, now for the fun part — actually putting the makeup on! The goal here is a “your skin but better” vibe, not a full transformation. Here’s a simple, beginner-friendly order of operations:
- Foundation or tinted moisturizer: Apply a small amount at a time and build up coverage gradually. Less really is more when you’re starting out.
- Concealer: Use this to brighten under the eyes and cover any spots. A quick heads-up: cool-toned concealers can look grayish under the eyes on deeper skin, so lean toward warm, peachy, or orange-based correctors instead.
- Setting powder: A light dusting keeps everything in place without flattening your natural glow.
- Blush or bronzer: Cream formulas tend to melt beautifully into deeper skin and give that lit-from-within finish that natural makeup is all about.
- Brows and mascara: Keep it soft — a couple of light strokes go a long way.
- Lip color: For a natural finish, go one to two shades deeper than your actual lip color, since shades that look “nude” in the tube frequently turn out too light once applied to deeper complexions.
Take your time with each layer, and don’t panic if it doesn’t look perfect on attempt number one — literally nobody nails winged eyeliner on their first try, and that’s totally fine!
Common Mistakes Beginners Make (and How to Dodge Them)
Every beginner makes mistakes — that’s just part of the learning curve, no shame in it whatsoever. But knowing the common pitfalls ahead of time means you can sidestep them entirely.
- Skipping the patch test. Always test new products on your jawline in natural light before committing to a full face of it.
- Ignoring oxidation. Some foundations genuinely darken a couple of shades within 10 to 15 minutes of application, so give a product time to settle before deciding it’s “wrong” for you.
- Going too light with concealer. For blemishes or dark spots, matching your shade exactly (or going just slightly lighter) works far better than a stark, obvious contrast.
- Forgetting sunscreen. We said it once, but it bears repeating because it’s that important for long-term, even-toned skin.
- Using the wrong tools. A dense makeup sponge or brush genuinely makes a night-and-day difference in how seamless your foundation looks.
If you keep these in mind, you’ll fast-forward past a lot of the frustration that trips up so many beginners.
Frequently Asked Questions
Do I really need sunscreen if I have deep, melanin-rich skin?
Yes, absolutely! While melanin does offer some natural defense, it isn’t nearly enough on its own. Dermatologists recommend at least SPF 30 daily, bumping up to SPF 50 for extended outdoor time.
How do I stop my foundation from looking ashy?
Ashiness almost always comes down to undertone mismatch. Look for foundations described as having warm, golden, or red undertones, and always test on your jawline in daylight before buying.
What’s the fastest way to figure out my undertone?
Try the vein test on your wrist, or hold white and off-white fabric near your face to see which one makes your complexion pop versus look washed out.
Is natural makeup for Black women just about wearing less product?
Not exactly! It’s more about technique and shade-matching than quantity. You can absolutely wear a full face and still look “natural” if the products are blended and shade-matched well.
What tools should a total beginner buy first?
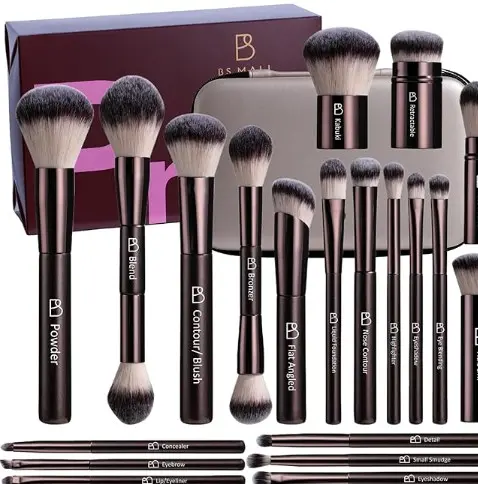
A good blending sponge, a fluffy powder brush, and an angled brush for brows will cover about 90% of what you need starting out.
Handy Products Worth Checking Out
If you’re ready to start building your kit, Amazon has a solid range of beginner-friendly options worth browsing:
- Makeup sponges and blenders
- Foundations for deep skin tones
- Broad-spectrum sunscreen for melanin-rich skin
- Beginner makeup brush sets
- Cream blush and bronzer duos
As always, read reviews carefully and, where possible, swatch in person before buying — what looks good in a product photo doesn’t always translate perfectly to your unique skin tone.
Wrapping It All Up
Learning how to do makeup for beginners is genuinely a journey, not a one-and-done event, and that’s totally okay. The most important thing to remember about natural makeup for Black women is that it’s rooted in celebrating your skin, not covering it up. Prep well, know your undertone, build your look slowly, and don’t be afraid to make mistakes along the way — every single person who’s “good at makeup” today started out exactly where you are right now.
So go ahead, grab that beauty blender, put on some music, and give yourself permission to have fun with it. You’ve got this!