The Best Sea Moss Gummies for Healthy Snacking and Wellness
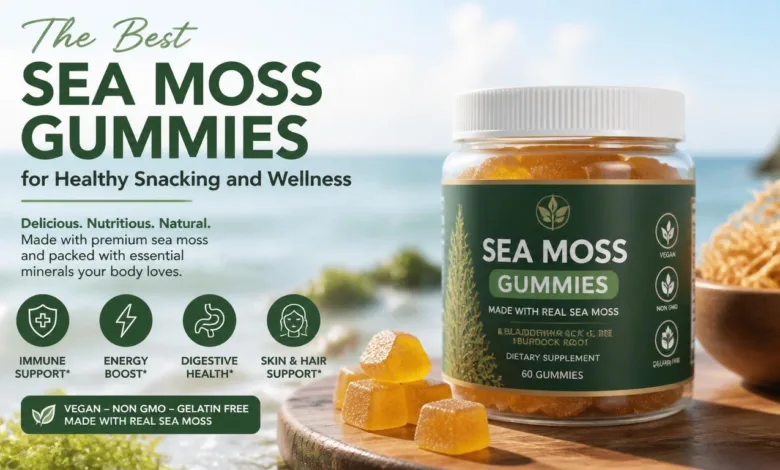
Making your own Sea Moss Gummies at home can be a rewarding experience. Not only is it straightforward and quick, but it also empowers you to customize the flavor and texture to suit your preferences and dietary needs. You might be surprised at how simple it is to whip up these nutritious treats, even if you’re new to using gelatin or agar. Let’s delve into how you can create these delightful gummies that everyone in the family will love.
What Are Sea Moss Gummies?
Sea Moss Gummies are small, chewy treats made with sea moss gel, a flavorful liquid, and a gelling agent such as gelatin or agar agar. These gummy snacks offer a convenient and delicious way to incorporate the benefits of sea moss into your diet without the strong taste that raw sea moss can sometimes have. With their pleasant texture and flavor, Sea Moss Gummies make for a perfect on-the-go snack or a nutritious addition to lunchboxes.
The Benefits of Sea Moss
Before we dive into the recipe, it’s worth highlighting the nutritional benefits of sea moss. Known for its rich mineral content, sea moss is packed with essential nutrients including iodine, potassium, calcium, and magnesium. It may help support immunity, improve digestion, and promote overall wellness. By transforming sea moss into gummies, you can enjoy these benefits in a great tasting format.
Why Make Your Own?
Creating your own Sea Moss Gummies means you have complete control over the ingredients. You can adjust the sweetness, select your favorite flavors, and tailor them to fit specific dietary requirements, such as low-sugar or keto-friendly options. This flexibility makes them an ideal snack for everyone from children to adults seeking healthier alternatives to store-bought treats.
Ingredients You Will Need
To make your Sea Moss Gummies, you’ll need the following simple ingredients:
-
1 cup of sea moss gel: This will be the base for your gummies. You can either make your own sea moss gel or purchase it pre-made. If you opt for homemade, ensure it has been prepared and stored correctly.
-
1/4 cup of fruit juice: Choose from flavors like orange, berry, or any juice you enjoy. If you’re looking to manage sugar intake, go for unsweetened varieties or consider using herbal tea.
-
2 tablespoons of honey or maple syrup (optional): This is for added sweetness. If you want a lower-sugar version, you might skip this or replace it with a few drops of liquid stevia.
-
1 tablespoon of gelatin or agar agar: Use gelatin for a traditional gummy texture or agar agar if you prefer a plant-based option. Be sure to follow the specific instructions on the agar agar package regarding preparation time.
-
1/2 cup of water: This will help dissolve the gelling agent and create the gummy base. Filtered water is best for optimal flavor clarity.
-
Optional flavor additions: Consider adding small fruit pieces or citrus zest for extra texture and flavor.
How to Make Sea Moss Gummies
The process for creating your gummies is straightforward and can be done in just a few simple steps. Let’s walk through it:
Step 1: Prepare Your Molds
Start by preparing your gummy molds. If you’re using silicone molds, lightly oiling them can help with the easy removal of the gummies later on.
Step 2: Dissolve the Gelatin or Agar Agar
Heat 1/2 cup of water in a small saucepan over low heat until it’s steaming but not boiling. Sprinkle the gelatin or stir in agar agar and whisk until it is completely dissolved. Pay attention as the mixture shifts from cloudy to clear, indicating that it’s ready.
Step 3: Combine Ingredients
Remove the saucepan from heat and whisk in 1 cup of sea moss gel until fully combined. The mixture may thicken slightly, which is normal. Next, stir in 1/4 cup of your chosen fruit juice. Taste the mixture and, if desired, add 2 tablespoons of honey or maple syrup for sweetness.
Step 4: Add Texture and Flavor
If you wish to include small bits of fruit or citrus zest, place them in the molds before pouring the liquid mixture over them. Pour slowly to minimize the introduction of air bubbles.
Step 5: Chill and Set
Allow the molds to cool at room temperature for about 10 to 15 minutes, then transfer them to the refrigerator. The gummies will take about 1 to 2 hours to fully set, depending on the size of the molds. Agar-based gummies typically firm up faster than those made with gelatin.
Storage and Usage Tips
Once your Sea Moss Gummies are set, gently pop them out of the molds and transfer them to an airtight container. They can be stored in the refrigerator for up to 7 days. For longer storage, consider freezing them. To freeze, place the gummies on a tray to flash freeze, then transfer them to a freezer-safe bag or container. They can be kept frozen for up to 3 months.
Serving Ideas
These gummies can be enjoyed in various ways. Here are some serving suggestions:
- Pair them with your mid-morning coffee or tea for a small, sustaining snack.
- Include them in kids’ lunchboxes as a fun treat.
- Present them as a colorful dessert option after dinner.
- Enjoy alongside herbal tea or sparkling water flavored with lemon.
Nutritional Information
A typical serving of two Sea Moss Gummies contains approximately:
- Calories: 20 to 35 (depending on the sweetener used)
- Protein: About 0.5 to 1 gram, which can increase with added collagen
- Carbohydrates: Approximately 3 to 6 grams, mainly from juice and honey
Troubleshooting Common Mistakes
While making Sea Moss Gummies is typically straightforward, a few common pitfalls can occur. Here are some expert tips to ensure your gummies turn out perfectly:
-
Using Proper Water Temperature: Always use steaming water to dissolve the gelatin or agar, as boiling can alter the texture of your gummies.
-
Proper Blooming: For gelatin, do not skip the blooming step, as this helps prevent grainy textures. Agar agar also needs to be fully dissolved for a smooth finish.
-
Avoid Overloading Molds: Adding too many pieces of fruit can disrupt the setting process. Stick to small bits for consistency.
-
Cool Before Pouring: Allow the mixture to cool slightly before pouring it into molds to prevent trapping steam and water bubbles.
-
Stir Well: Ensure that the mixture is whisked thoroughly after adding the sea moss gel and juice to achieve a uniform texture.
Experimenting with Variations
The beauty of creating Sea Moss Gummies is that you can easily customize them to fit your taste preferences or dietary needs:
-
Keto-Friendly: Substitute fruit juice with brewed hibiscus or lemon tea and use a non-caloric sweetener.
-
Vegan Option: Stick with agar agar and enhance the texture by adding coconut cream if desired.
-
High-Protein Version: Introduce unflavored collagen peptides to increase protein content without altering the taste.
-
Kid-Friendly Ideas: Use vibrant fruit purees and fun molds to make unique shapes that appeal to younger audiences.
Final Thoughts
Making Sea Moss Gummies is not only a fun culinary project but also a fantastic way to harness the nutritional benefits of sea moss. With just a few hours and some easy-to-find ingredients, you can create a healthy snack that will delight your palate and contribute to your overall wellness. This weekend, try your hand at these gummies, and you might find they become a staple in your household for convenient snacking. Enjoy the process of crafting your own treats and revel in the satisfaction of knowing exactly what’s in your food!