Homemade Gelatin Gummies Recipe for Healthy Collagen Candy
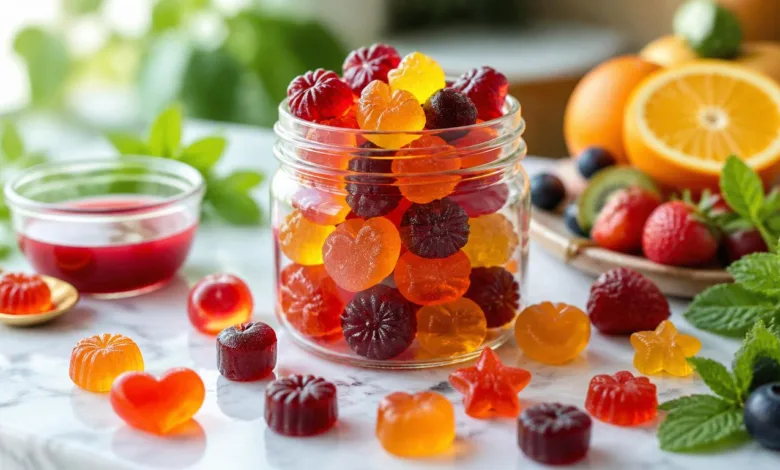
Satisfy Your Sweet Tooth with Guilt-Free Gelatin Gummies
When sweet cravings hit, gelatin gummies make an ideal treat that won’t leave you feeling guilty. This delectable snack combines simplicity with health benefits, bringing together just a few natural ingredients and your favorite fruit juice. The best part? You don’t need any fancy candy molds or previous experience to whip them up. Unlike commercial gummies laden with artificial additives and sugars, homemade gelatin gummies are rich in wholesome goodness, including collagen from gelatin that promotes skin, joint, and gut health. These delicious bites are endlessly customizable, making them a hit with both kids and adults alike. Let’s dive into why these gelatin gummies are a fantastic addition to your snacking repertoire.
Why Gelatin Gummies Are a Must-Make
These delightful gummies are not just enjoyable to eat; they also serve a multitude of health benefits wrapped up in a chewy treat. Here are some compelling reasons to start making your own gelatin gummies at home:
A Perfect Combination of Taste and Nutrition
Gelatin gummies offer a soft, chewy texture that’s irresistibly satisfying, especially when made with flavorful juices. They are made with natural ingredients that can accommodate various dietary preferences, including low-carb, high-protein, and keto diets. Unlike conventional gummy candies filled with sugars and artificial ingredients, these homemade variations present a nutri-rich alternative without compromising on flavor.
Simple Three-Step Process
Making your own gelatin gummies is a breeze and only requires three straightforward steps: blooming the gelatin, mixing it with juice and sweetener, and allowing it to set in the refrigerator. Whether you opt for silicone molds or simply pour the mixture into a dish, the preparation is accessible and beginner-friendly.
Nutritional Benefits
Each serving of these gummies provides a satisfying balance between indulgence and health. With their low sugar content and moderate protein levels, they can fit well into various diet plans. Utilizing low-glycemic juices like berry or pomegranate can ensure they align with keto or low-carb eating habits.
The Power of Natural Ingredients
- Fruit Juice: Packed with vitamins and antioxidants, especially if you opt for fresh-squeezed options like orange, berry, or tart cherry.
Creative Ways to Enjoy Gelatin Gummies
The fun doesn’t stop at simply making gelatin gummies; there are numerous ways to enjoy and serve them. Here are some creative serving ideas for your delightful treats:
Fruity Ice Pops
Instead of using gummy molds, pour your gelatin mixture into popsicle molds and freeze them for a refreshing summer snack. This method is especially popular with kids and offers a cooler way to enjoy your favorite flavors.
Fun Party Treats
Serve your gelatin gummies at gatherings in whimsical shapes. Use cookie cutters to create unique and festive designs that will make them a hit at birthday parties or family get-togethers.
Meal Prep Snacks
Keep a batch of these gummies on hand for quick, sweet snacks throughout the week. They make for a nutritious option to satisfy those afternoon cravings without derailing your healthy eating plan.
Keeping Your Gelatin Gummies Fresh
To ensure your homemade gelatin gummies stay fresh and tasty:
- Storage: Place your gummies in an airtight container in the refrigerator, where they can last up to two weeks.
- Freezing Option: You can also freeze them for longer storage. They can remain in the freezer for one to two months. When you’re ready to enjoy them, simply let them thaw in the refrigerator.
Common Pitfalls to Avoid
While making gelatin gummies is generally easy, certain mistakes can affect the outcome. Here are some pitfalls to watch for:
Skipping the Blooming Step
Forgetting to allow the gelatin to bloom can result in a gummy texture that’s not desirable. Always allow the gelatin to hydrate properly before proceeding.
Boiling the Mixture
Avoid boiling the mixture, as this can denature the gelatin and lead to a less chewy consistency. Keep the heat low to ensure a perfect texture.
Skipping the Sweetener
While fruit juice adds flavor, omitting the sweetener can leave the gummies tasting flat. Experiment with different sweeteners to find the taste that suits you best.
Expert Tips for Perfect Gummies
Once you’re comfortable with making gelatin gummies, here are some professional tips to enhance your results:
Experiment with Flavor Combinations
Don’t feel constrained to one type of juice. Mix and match different flavors for exciting combinations, such as pineapple-strawberry or mango-lime.
Add Nutrients
Consider adding a scoop of powdered vitamin C or other nutritional blends to boost the health benefits of your gummies. This can enhance their nutritional profile without sacrificing flavor.
Use Flavored Gelatin
For an even more intense taste, feel free to substitute your homemade mix with flavored gelatin available at stores. Just be mindful of the added sugars.
How to Make Homemade Gelatin Gummies
Ready to create your very own gelatin gummies? Here’s a simple recipe to get you started.
Ingredients You’ll Need
- 2 cups of your favorite juice: Fresh-squeezed juice will yield the best flavor.
- 4 scoops of bovine gelatin (about 4 tablespoons): This is essential for achieving the chewy texture and contributes collagen to your gummies. For a vegan alternative, consider agar-agar.
- 1/4 cup of honey or maple syrup: Honey works wonderfully for sweetness, while maple syrup is an excellent vegan choice. Keep in mind that the type of sweetener may slightly alter the flavor and texture.
Step-by-Step Instructions
-
Bloom the Gelatin: Pour your juice into a saucepan and sprinkle the gelatin over the liquid. Allow it to rest for about ten minutes until the mixture appears spongy.
-
Heat the Mixture: Place the saucepan over medium-low heat and stir gently until the gelatin is completely dissolved. Be careful to avoid boiling.
-
Incorporate Sweetener: Remove the saucepan from the heat source and stir in your chosen sweetener until fully combined.
-
Pour and Set: Pour the gummy mixture into silicone molds or a glass dish. If using a dish, carefully skim off any bubbles floating on the surface.
-
Refrigerate: Allow the mixture to chill in the refrigerator for a minimum of two hours or until firm to the touch.
-
Enjoy: If you used molds, gently pop the gummies out. If you made them in a dish, cut them into small squares and enjoy your homemade gelatin treats!
Nutritional Highlights
Each serving of these gelatin gummies can provide:
- Low sugar content
- Good source of collagen
- Natural ingredients without artificial additives
Frequently Asked Questions
What are gelatin gummies?
Gelatin gummies are chewy, fruit-flavored snacks predominantly made from gelatin and flavored liquid, such as fruit juice. They offer a fun, nutritious alternative to conventional gummy candies.
How can I customize my gummies?
The beauty of homemade gelatin gummies lies in their versatility. Feel free to experiment with different juices, sweeteners, or even add-ins like vitamin supplements or bits of fruit for added texture.
Are these gummies suitable for children?
Absolutely! Gelatin gummies are a hit with little ones due to their fun shapes and delicious flavors, making them a healthy snack option for kids.
Can I make these gummies vegan?
While traditional gelatin comes from animal sources, you can use agar-agar as a vegan substitute. However, be aware that the texture and firmness may differ from those made with animal-based gelatin.
Homemade gelatin gummies are an enjoyable, healthy treat that is fun to make and perfect for everyone in the family. Once you get the hang of the basics, you’ll find countless ways to adapt flavors and styles, enabling you to create a snack that keeps on giving. So why not roll up your sleeves and get started on a tasty journey toward healthier indulgence? Happy snacking!